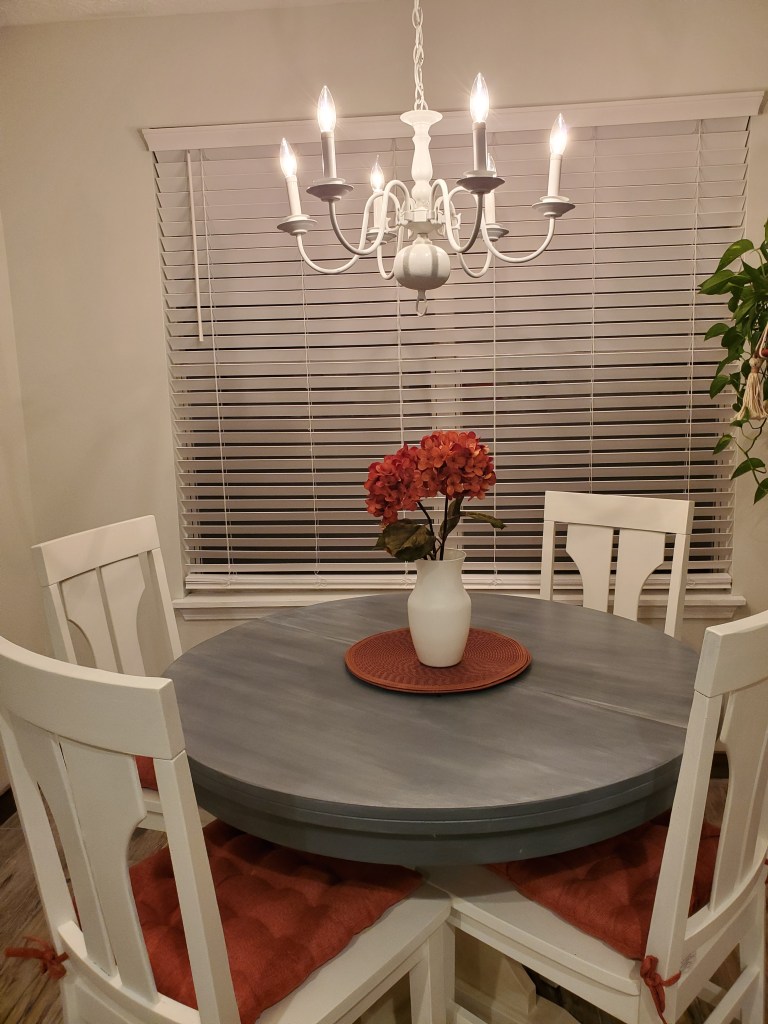
Every project you will catch me saying “this is my favorite project.” I can’t pick a favorite. I would be as bad as a mom picking a favorite kid. It’s just not right! I love them all … but this one brings me so much joy just seeing it. In the middle of tackling it though, was a different story. I cried twice painting this table. Getting the table top to look exactly how I have envisioned it took so much work and created so much pressure that I put upon myself. But alas, here it is. And I love it.
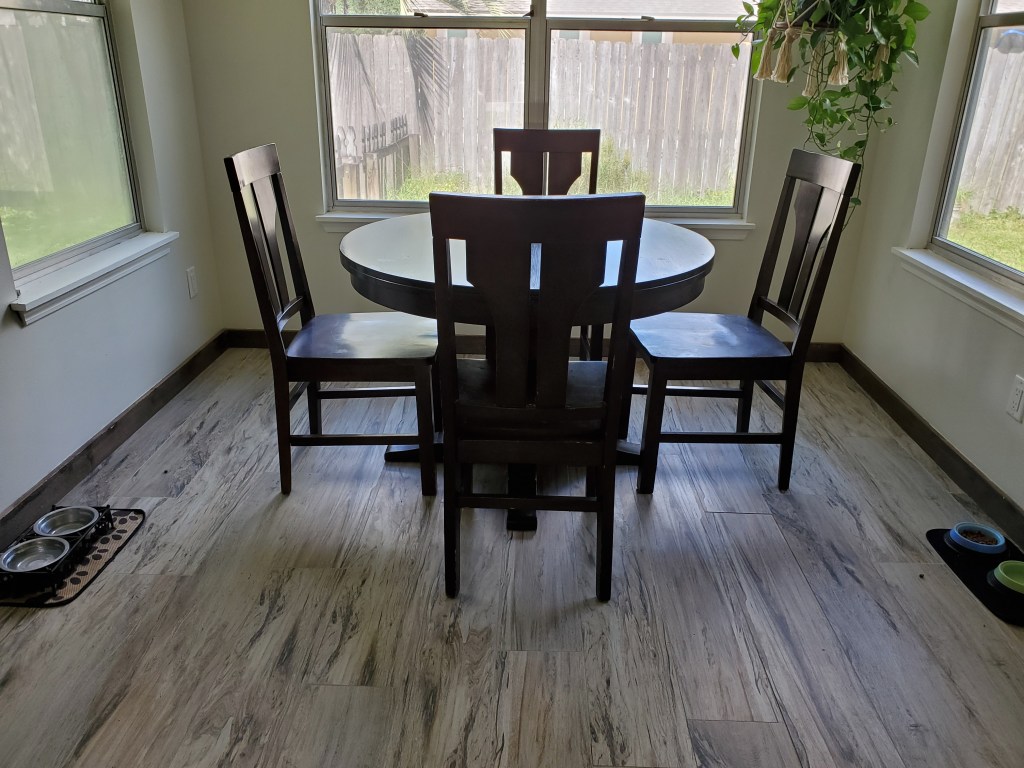
I found this table on Facebook MarketPlace after hitting up every thrift store within reasonable distance of my home, work and church (which covers a great distance) and had come up empty handed each time. I really had been hoping for a high top, square table. Instead I found a round, regular small table, with a leaf. Long story short, I was gifted the table for free from the family when I went to pick it up. We go to the same church and they insisted I just take the table. A total blessing and reminder that there are good people in this world!
Other than some small dings on the table there were no big issues. The leaf wheel has a crack on it so we won’t be seating more than 4 at a time until that is fixed. I was so excited for the blessing and couldn’t wait to throw some paint on this beauty and see how it would totally transform my breakfast nook area.
For this project I used:
- Bullseye 1-2-3 Primer (2 light coats)
- Valspar Chalky Paint – Opera Gown
- Valspar Chalky Paint – Hopes Chest
- Valspar Chalky Paint – Kids Gloves
- Minwax Polycrylic Matte Sheen Top Coat
- Wet sea sponge & water bottle
- A lot of patience
- Some blood
- Tears!
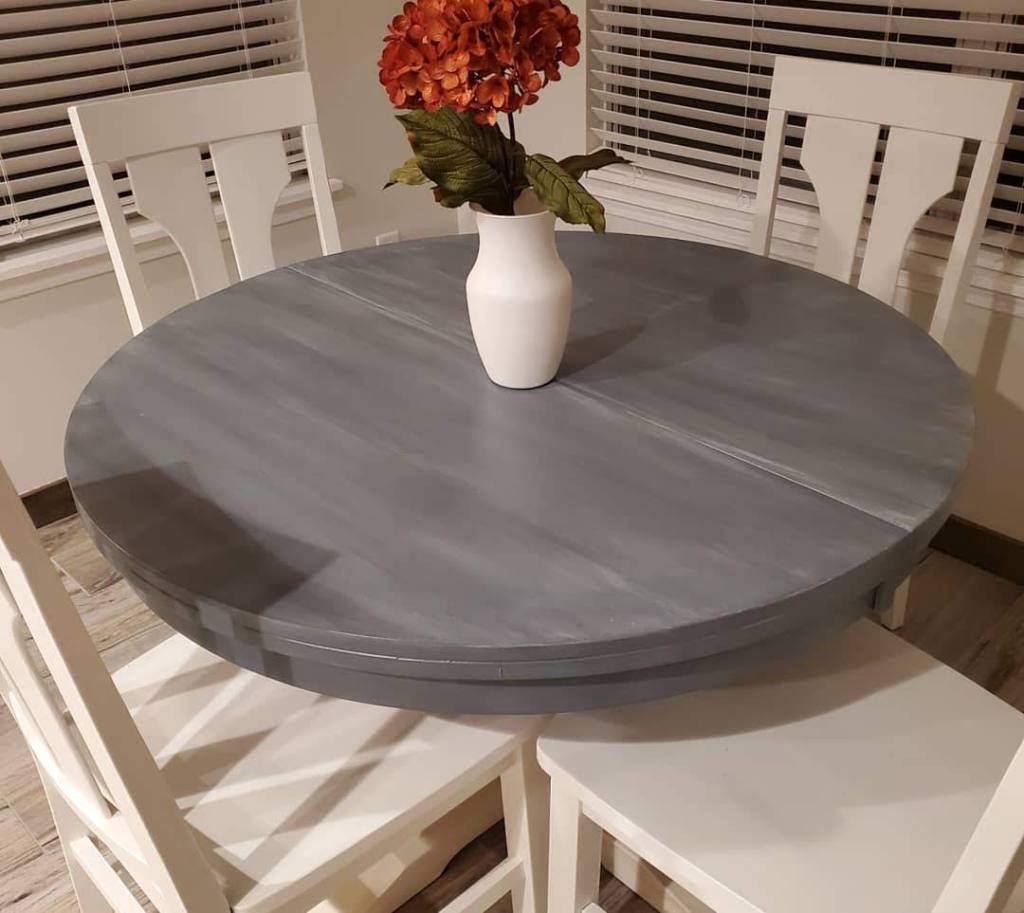
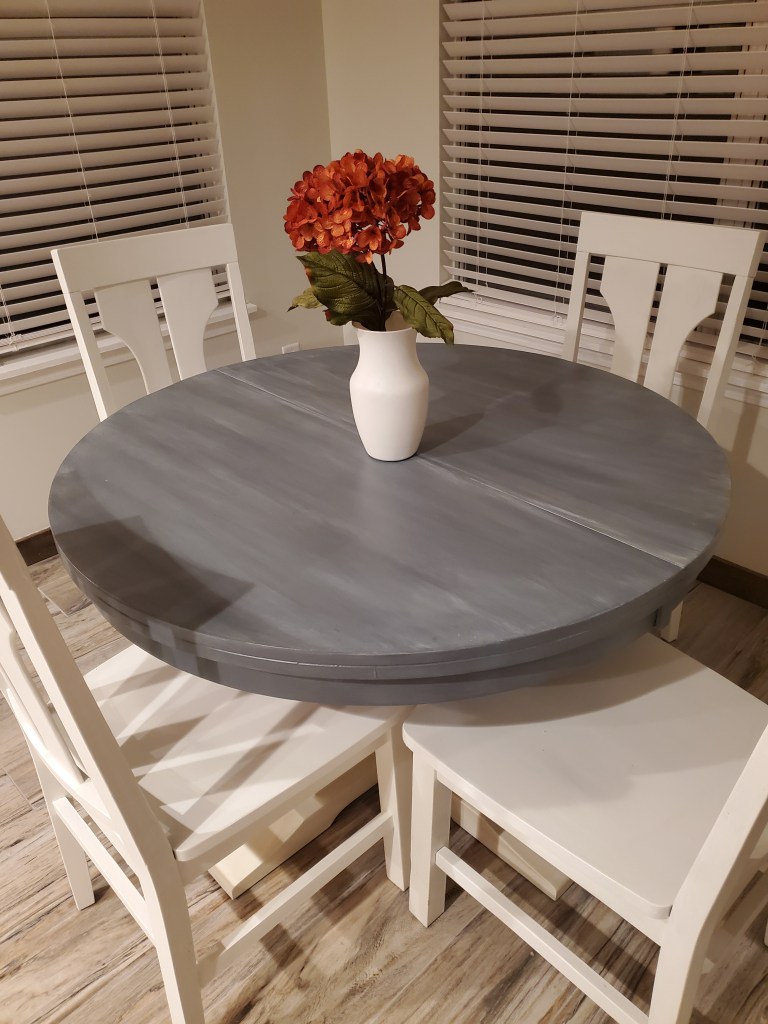
But it was all so worth it! I am so in love with this table and how the top came out. Originally I wanted to do an antiqued crackle look on the top but the crackle didn’t take so I had to start over . That’s where the tears came in!
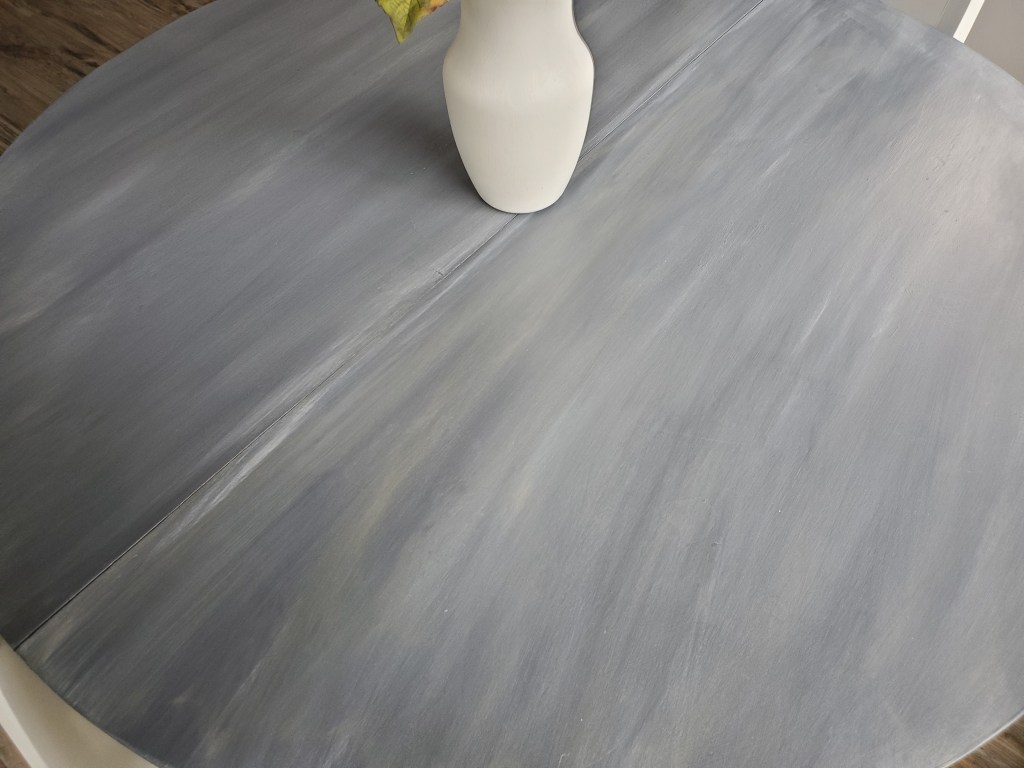
The top design of gray with white and hint of brown was done with a sea sponge, water and paint. Lots of trial and error but finally I got the look I was going for and couldn’t be happier. If you decide to ever try this design and haven’t done it before, don’t give up, you may get frustrated, but don’t quit. When in doubt just add white back to it and slowly add the 2nd color. Eventually you will step back and it will be the exact look you were wanting to obtain.
I added a touch of color to my painted – YES PAINTED – vase with a Hobby Lobby purchase of 2 hydrangea flowers and added same colored place mats underneath as well as some seat cushions for the finishing touch!